
before
On occasion, people will like the form and size of a painted cupboard, but can’t live with the colour. Your options assuming the paint is not original which is when I would encourage people to learn to love it as it is or let someone who does own it, are to either strip it down and refinish the wood, strip it down and repaint it, or in the cases were the piece is in a stable old oil paint, to simply prepare the surface and repaint right over the last coat. Done properly this approach can be the most natural of any of the processes, and is in fact what happens to many cupboards over the course of their lives anyway. I imagine the scenario were someone decides the old cupboard just looks tired and doesn’t fit in anymore, and the most natural thing to do is to go out to the garage and grab a can of paint you like and away you go. It’s currently fashionable to strip the cupboard and apply a “chalk paint”, and then rub and sand it down in an attempt to look like natural wear. If this is the look you like, go for it, but I think in many cases it ends up looking unnatural. Especially if a cupboard was made in the period after oil paint was invented around the turn of the 20th century, the most natural thing to happen would be for it to be painted in oil. Therefore, if your objective is to make it look good but not “messed with” your best approach can be to repaint in oil paint and then rub down the surface a bit to not have it look too new and shiny. To my mind, this is the most natural and effective way to give a piece new life, and of course it is a lot less work that stripping it.
Witness here exhibit “A”. A big old beast of a wardrobe from Quebec made about 1900 of an unattractive Ash wood which was probably painted white as soon as it was made. On top of that original white, someone later has painted it cream with a flashy, vibrant blue for the panels and trim. My customer loves the form but cannot live with the bright colour, so has asked me to paint it all in a mid grey which will fit in with the rest of her décor. She prefers that it be all of one colour so it blends in to the room. She gives me a paint sample of the preferred colour.
Here in Canada they have decided that oil paint is dangerous and have taken it off the market, so you either take a trip to the states where they are still sensible and allow the sale of oil paint, or find some old stock (I’ve hoarded quite a bit of the stuff), or in this case use the only form of oil based paint still available here which is rust paint. The paint store informed me that this too will soon be pulled from the market. A pity because for one thing all latex “so called” floor paints are total garbage and should be banned. Every time you drag something across latex paint it peals like a balloon and so is quite worthless. This is the case as well if you use it on your cupboard and try to rub it down a bit to look aged and worn. It just peels off and looks like garbage. I much prefer the old original oil paints as you can get a less shiny surface, but the rust paint works in a pinch and you can tint it exactly as you wish.

cleaning the surface
The first step is to prepare the surface. It must be clean and any loose paint removed. Sometimes this requires some light sanding but in this case, all I did was to brush and rub it down completely with turpentine to remove the dirt and any wax that may have been applied. You can use paint thinner, but for a couple of dollars more I prefer the turpentine. Do this in a well-ventilated area of course. A garage on a nice day when you can have the door open and a fan going is perfect. When it is completely rubbed down and clean you are ready to paint.
I thin the paint by about 20% with the turps. I’ll even go thinner if I want a lot of the old paint to show through, but in this case, we want only small areas of the old paint to show.
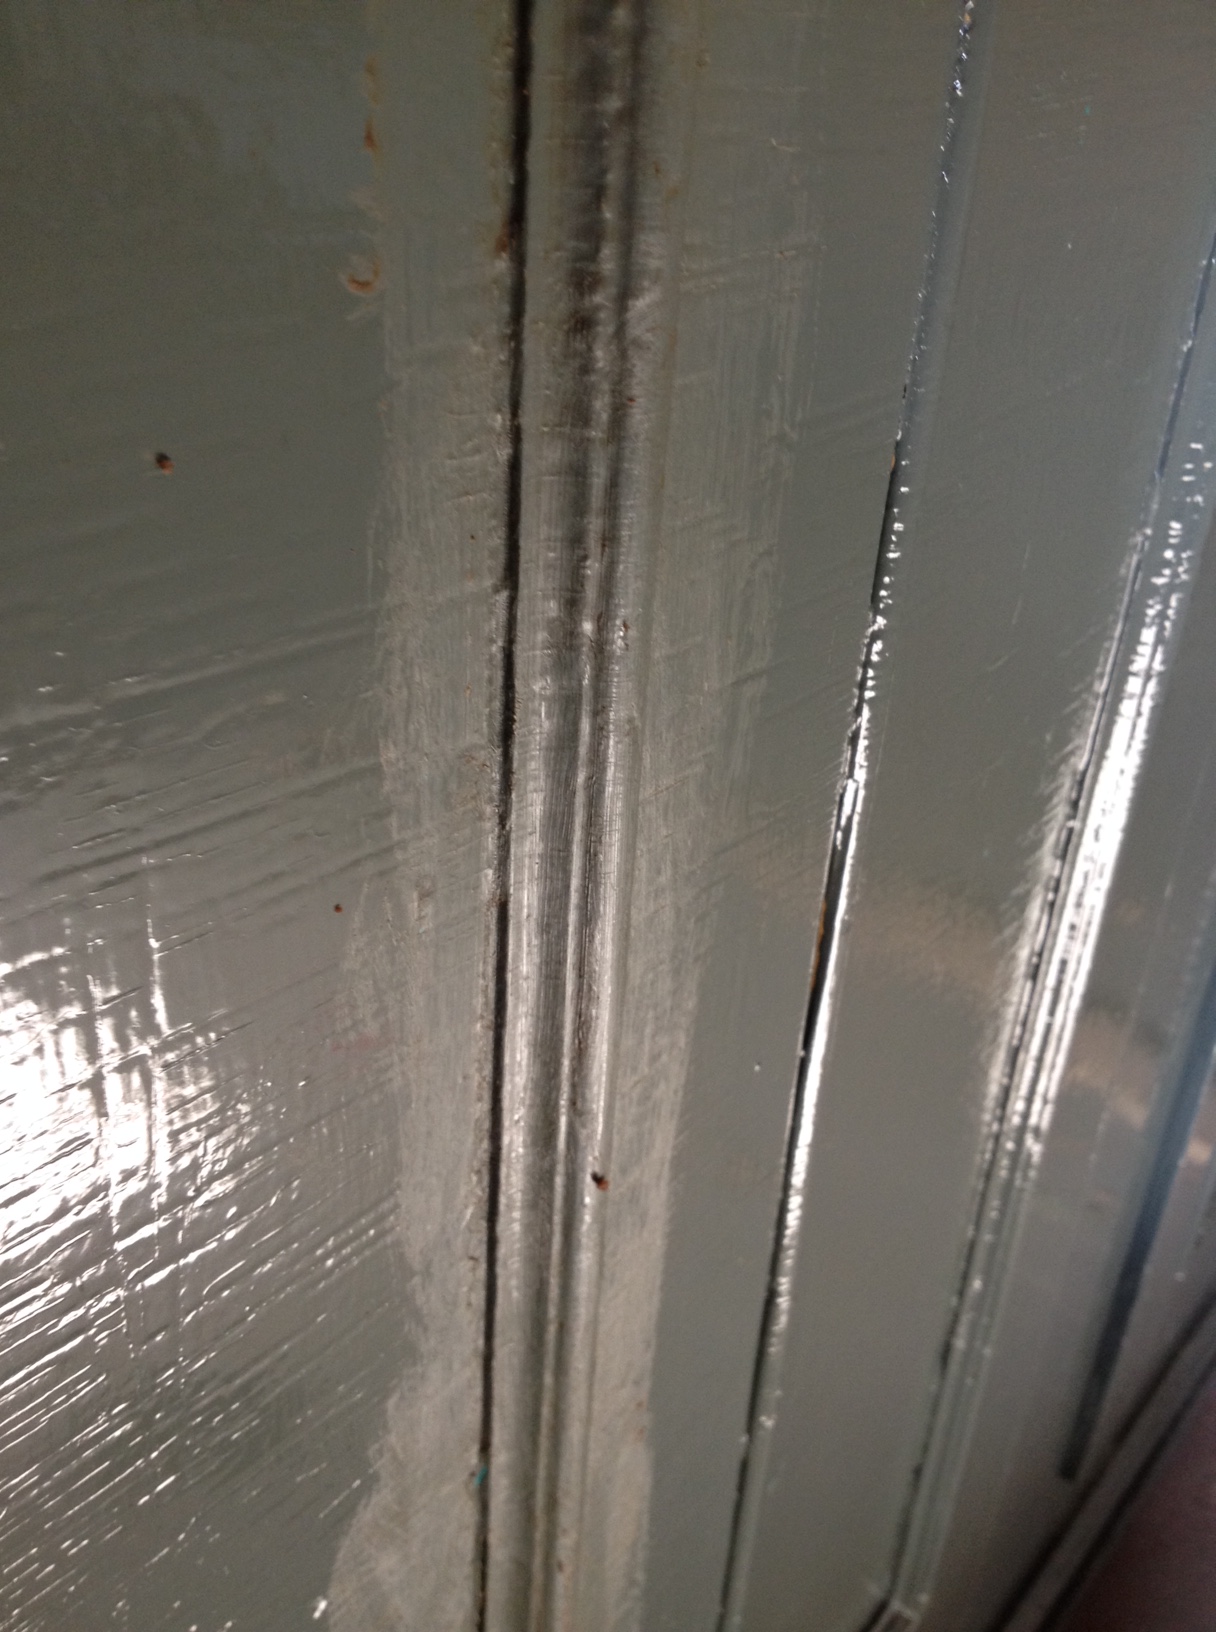
Put an even coat over everything. Then wait a day or so depending on the temperature to let it dry. This is the slightly tricky part, because you want the paint dry, but to soften the gloss of the surface and wear it through slightly it is best if it is not completely hard set. A bit of rubbing along the bottom of the side is a discreet place to test.

waxing with a stiff brush
In the case of this cupboard, as the weather was warm it was ready to be rubbed down the next day. It should be noted that you must have a temperature above 50 degrees Fahrenheit or the oil paint will take forever to dry.
Next, apply a thick coat of Min wax for dark woods over the entire piece using a stiff brush and fine 00 steel wool. You will see that when you rub hard a bit of the paint will come off along the edges and where the under-paint is worn. Take your time and work evenly. Do not attempt to rub through more vigorously around the knobs or in places you think should show more wear as this always becomes obvious. 
If you rub evenly the paint will naturally come off a bit more in these places. You will note that the dark wax lays in the little creases and accentuates them. This slight dirtiness also gives the piece a more natural patina and softens the overall look. Let the wax dry for a couple of hours and then give it a light buffing with a bit of burlap or an old wool sweater. Not too much or it becomes shiny.
showing how wax dulls the surface
When this dries, you are done. The piece may still look a little shiny but let it be and nature will take its course. Over the weeks and months, the surface will settle and age. If you get it right, it’s a good way to bring new life to a piece without having it look done over.

after