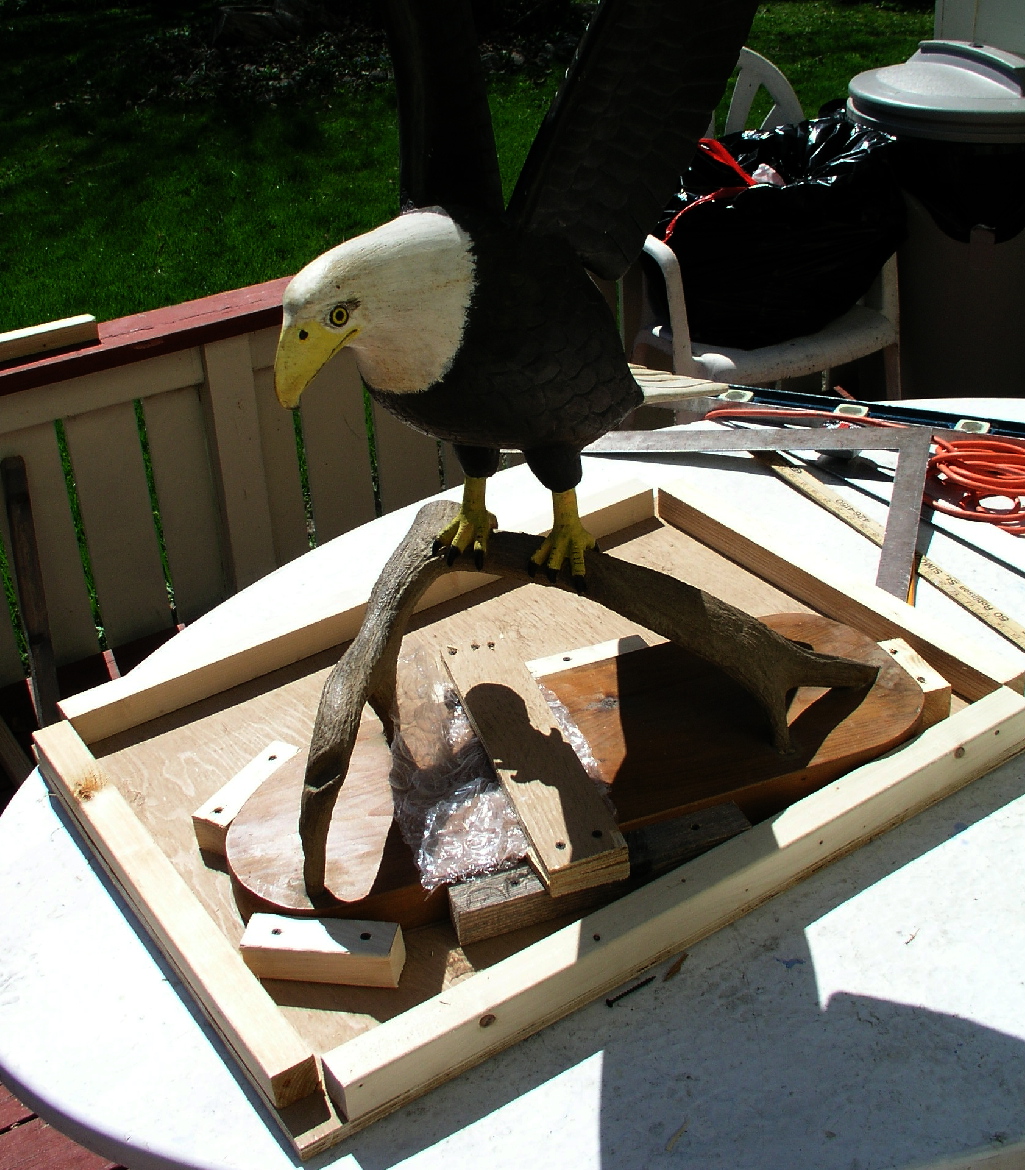
step 1 -secure to the base
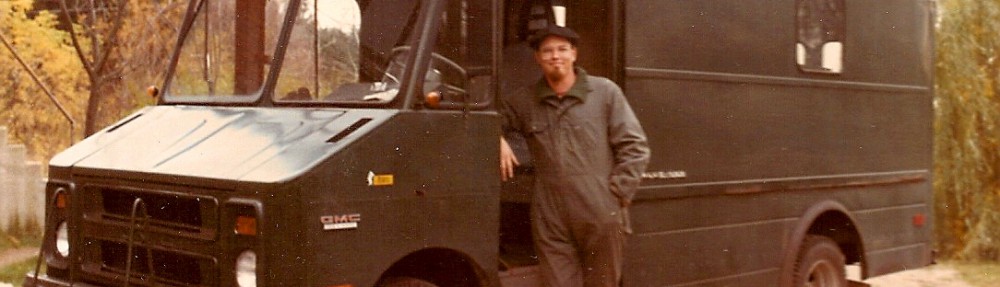
Every once in a while it is good to take on something that is clearly out of your range of ability. Good to stretch, and persevere, and hopefully at a successful end feel that clean moment of well-deserved accomplishment. It was that theory, along with my inherent desire to please people which lead me to say “yes” to a request to pack and ship a delicate and fragile piece of folk art to a buyer in British Columbia. A friend and regular customer from Victoria had built a nifty addition to his home and he spotted on my Collectivator web page a large spread winged carving of an eagle, perched on an antler no less, and decided he had the perfect spot for it above the entry door. The carver balanced the heavy wooden body on two life-sized (read small) wooden legs and did not do the standard trick of adding a separate brace to the body. These braces always detract from the piece but are almost a necessity to insure the piece will not break when moved. I loved the way the piece looked but it was always my hope that someone would come along to the shop and buy it, and I could help them carefully wrap it in a blanket, place it on the back seat of their car and wave bye bye. No such luck. It was flying to Victoria.

step 2 – frame the box
My initial thought was to hire a professional art packer and shipper, and pass off the responsibility of getting it there to a professional. My friend, Dennis is easy going and didn’t mind paying for services rendered. However, when the quote came back at $950, we both baulked and decided there had to be another way. I have packed many things over the years and I am pretty good at it, with only a few pieces of broken pottery clouding my record, and so after exhausting any possibility of finding someone who was driving that way and could take it, I offered that I would do my very best to pack it and get it there, with the understanding that if something went wrong and it was broken in transit, Dennis would look after getting someone local to repair it. Of course if this happened it would be a real pain to find someone with the necessary skills, and there would be no guarantee that it would ever be “as good as new”. Still, I knew that if I took my time, and didn’t scrimp on the materials, Lord willin’ and the creek don’t rise, etc. So with a gentleman’s agreement in place, it was time to pack the eagle.

step 3 – add three sides
One good bit of advice that I have always followed is that when you find yourself out of your element consult a professional. One advantage of an antique seller’s lifestyle is that you meet and get to know people in every profession. It happens that I have a regular customer and friend named Paul in town who is a retired engineer. I knew I was in luck when soon after he came into the shop with a buddy who is also an engineer, and moments after my introducing and requesting assistance on the project, he and his pal were measuring things up and drawing diagrams. Paul was on-board, and I had a short list of materials to buy, and a commitment for the following Saturday morning to build the box together out back of Shadfly on the porch.
We knew that the crate would need to stay in an upright position, but also that it may be tipped up or rocked about in shipping. The 42” wide wingspan could not be pressing against anything, and the whole thing would need to be fixed down to the box so it could not shift around. Then there was the weight and delicate balance of that heavy body on those tiny wooden legs.
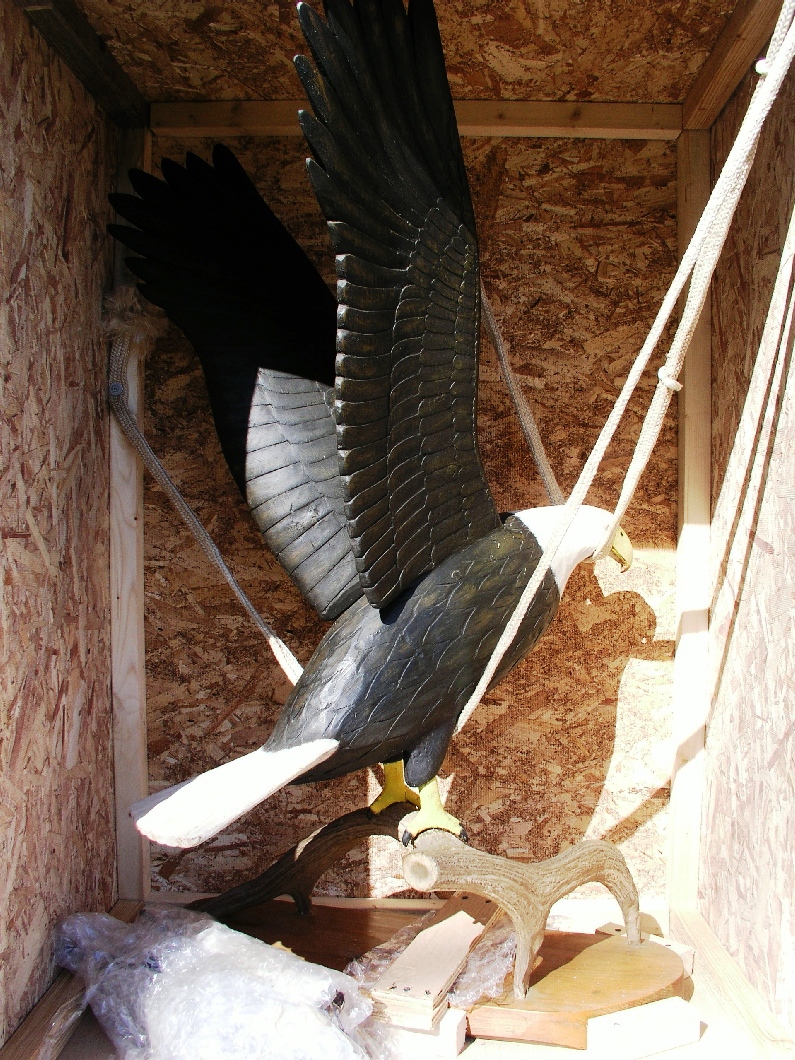
step 4 – install rope supports
Step one was to secure the base of the sculpture to the bottom of the box preferably without marking it up. We screwed down blocks on all sides and then screwed down a piece which went straight across the base thus locking it down. We attached 2”x4” skids so it could be lifted with a lift truck. We then built the 2”x2” frame up from the base which would hold the sides, putting the top on temporarily to keep the structure square. Next we put on three of the sides. With three sides on, we next affixed two wide, soft nylon, flat ropes. One under the belly, the other under the chin of the bird. These allowed for a slight amount of movement but also continuous support. On with the fourth side and taking the lid off we then filled it from top to bottom with Styrofoam chips and a layer of foam on top. When the top was secured, she was ready to go.

step 5 – fill with chips and foam
I had been calling around to CN, Fed Ex, etc. before a friend told me to call a company called “Just ship it”. They compare all the various carriers for you and advise you on who’s best. I called up and a very helpful woman took down the particulars. Within a few minutes I received an e-mail from her suggesting a couple of alternatives. Although it was a few dollars more than Fed-ex she recommended I use Day and Ross because they have a better reputation for being careful. The total cost was less than $300, and the piece would arrive within five working days. She suggested that I could go on-line to their website and complete the order, but did not mind when I asked if she could just go ahead and do it for me. Sometimes these registering procedures can be complicated and not always successful using my then out of date browser. Within minutes she sent me the papers I needed to attach to the box and the pick-up was ordered. “When can I expect them?”. “Oh, it will be today, probably this morning”. Really? That soon. So I hung up the phone, printed and filled out the papers, had a coffee, and set off next door to Shadfly to finish the prep. To my total surprise there was a Day and Ross transport parked in front of the shop. “Are you here for a pick-up?” “Yes, I have an order to pick-up at Shadfly Antiques.” “That’s amazing. I just got off the phone, and you are already here. How did that happen? “well, I just happen to be in town picking up at another place and the order came through on my phone, so here I am. Just lucky I guess” “Great, well you will just have to give me a couple of minutes to tape on these labels and it’s all yours. Nice fellow. No problem, he got his truck ready while I set to work with the labels and fifteen minutes later the big crate full of eagle was sitting in the front of an otherwise empty 40’ van. He secured it in place and gave me his assurance that it would be looked after. “It will be back at the warehouse tonight and will be put on the truck for B.C. in the morning. They’ll keep it upright and be gentle with it. Don’t worry” Easily said, but I did worry of course. I was delighted four days later to receive a picture from Dennis entitled “snow in summer” because of the waves of Styrofoam chips surrounding the opened crate. There in the middle of it, looking exactly as it had when it left was the eagle perched precariously on an antler. Dennis managed to get it in the house and mounted without incident. A big sigh of relief all around.

step 6 – the eagle has landed

SWEET! as they say
Great blog Phil,exciting reading and great pictures…..Goes to show: “Where there is a will. there is a way”….you. of all people have always known that.